Go green!

Plant with
recycled pots.
Plastic type: HDPE
Thickness: 2.75mm
Weight: 240 grams
Project Coordinator: Sara Ordonselli
Design Process Coordinator: Felix Beaudry
Designer: Emily Phillipps
Make the Sheet
-

Gather recycled HDPE plastic.
Wash HDPE recycled plastic.
Shred HDPE plastic.
Weigh 240g of HDPE plastic using a scale. Make sure to zero the container the plastic is being weighed in.
Plastic Sheet Melting Process
-

Place weighed plastic pieces on the heat resistant black sheet. Cover the plastic with the other half of the heat resistant black sheet. Place this on 1 clean steel plate.
Continuously crank the sheet press as the plastic melts to compress and properly melt the plastic.
When the plastic is compressed fully, remove it from the sheet press.
-

4. Remove the melted plastic from the heat resistant plastic sheet with gloves by rolling the melted plastic upward (folding the material will cause air bubbles, so rolling the material tightly is best).
-

5. Pull and mix the melted plastic over a metal rod held by a clamp secured on the edge of a table.
-

6. Repeat steps #5-10 with the melted plastic until the color of the plastic is homogenous.
-

7. Once the melted plastic appears homogeneous in color, fold the melted plastic in a ball shape and press between the heat resistant sheet on the metal sheet.
-

8. Place this sheet from step #11 into the sheet press. Crank the press until both heat plates are about 1 inch apart. This will compress the melted plastic into a “burger” shape or 1 inch thick disk.
-

9. Spray a metal sheet with soap spray to ensure the plastic can be removed from the mold. Place the “burger” formed melted plastic on the sheet. Make sure the plastic is within the boundaries of the metal frame that will be placed on the edge of the sheet. Place another clean metal sheet on top of this.
10. Place #5 metal sheets & plastic in the sheet press. Crank the sheet press compressing the melted plastic until both metal sheets are touching.
-

11. Once finished (~3-4 min), Remove #6 from the sheet press with gloves and place cool aluminum plates on top and a weight on top. Allow it to cool ~5 min.
-

12. Once the metal is cool to the touch, the melted plastic sheet has hardened and can be removed from the mold.
Make the Flower Pot
-
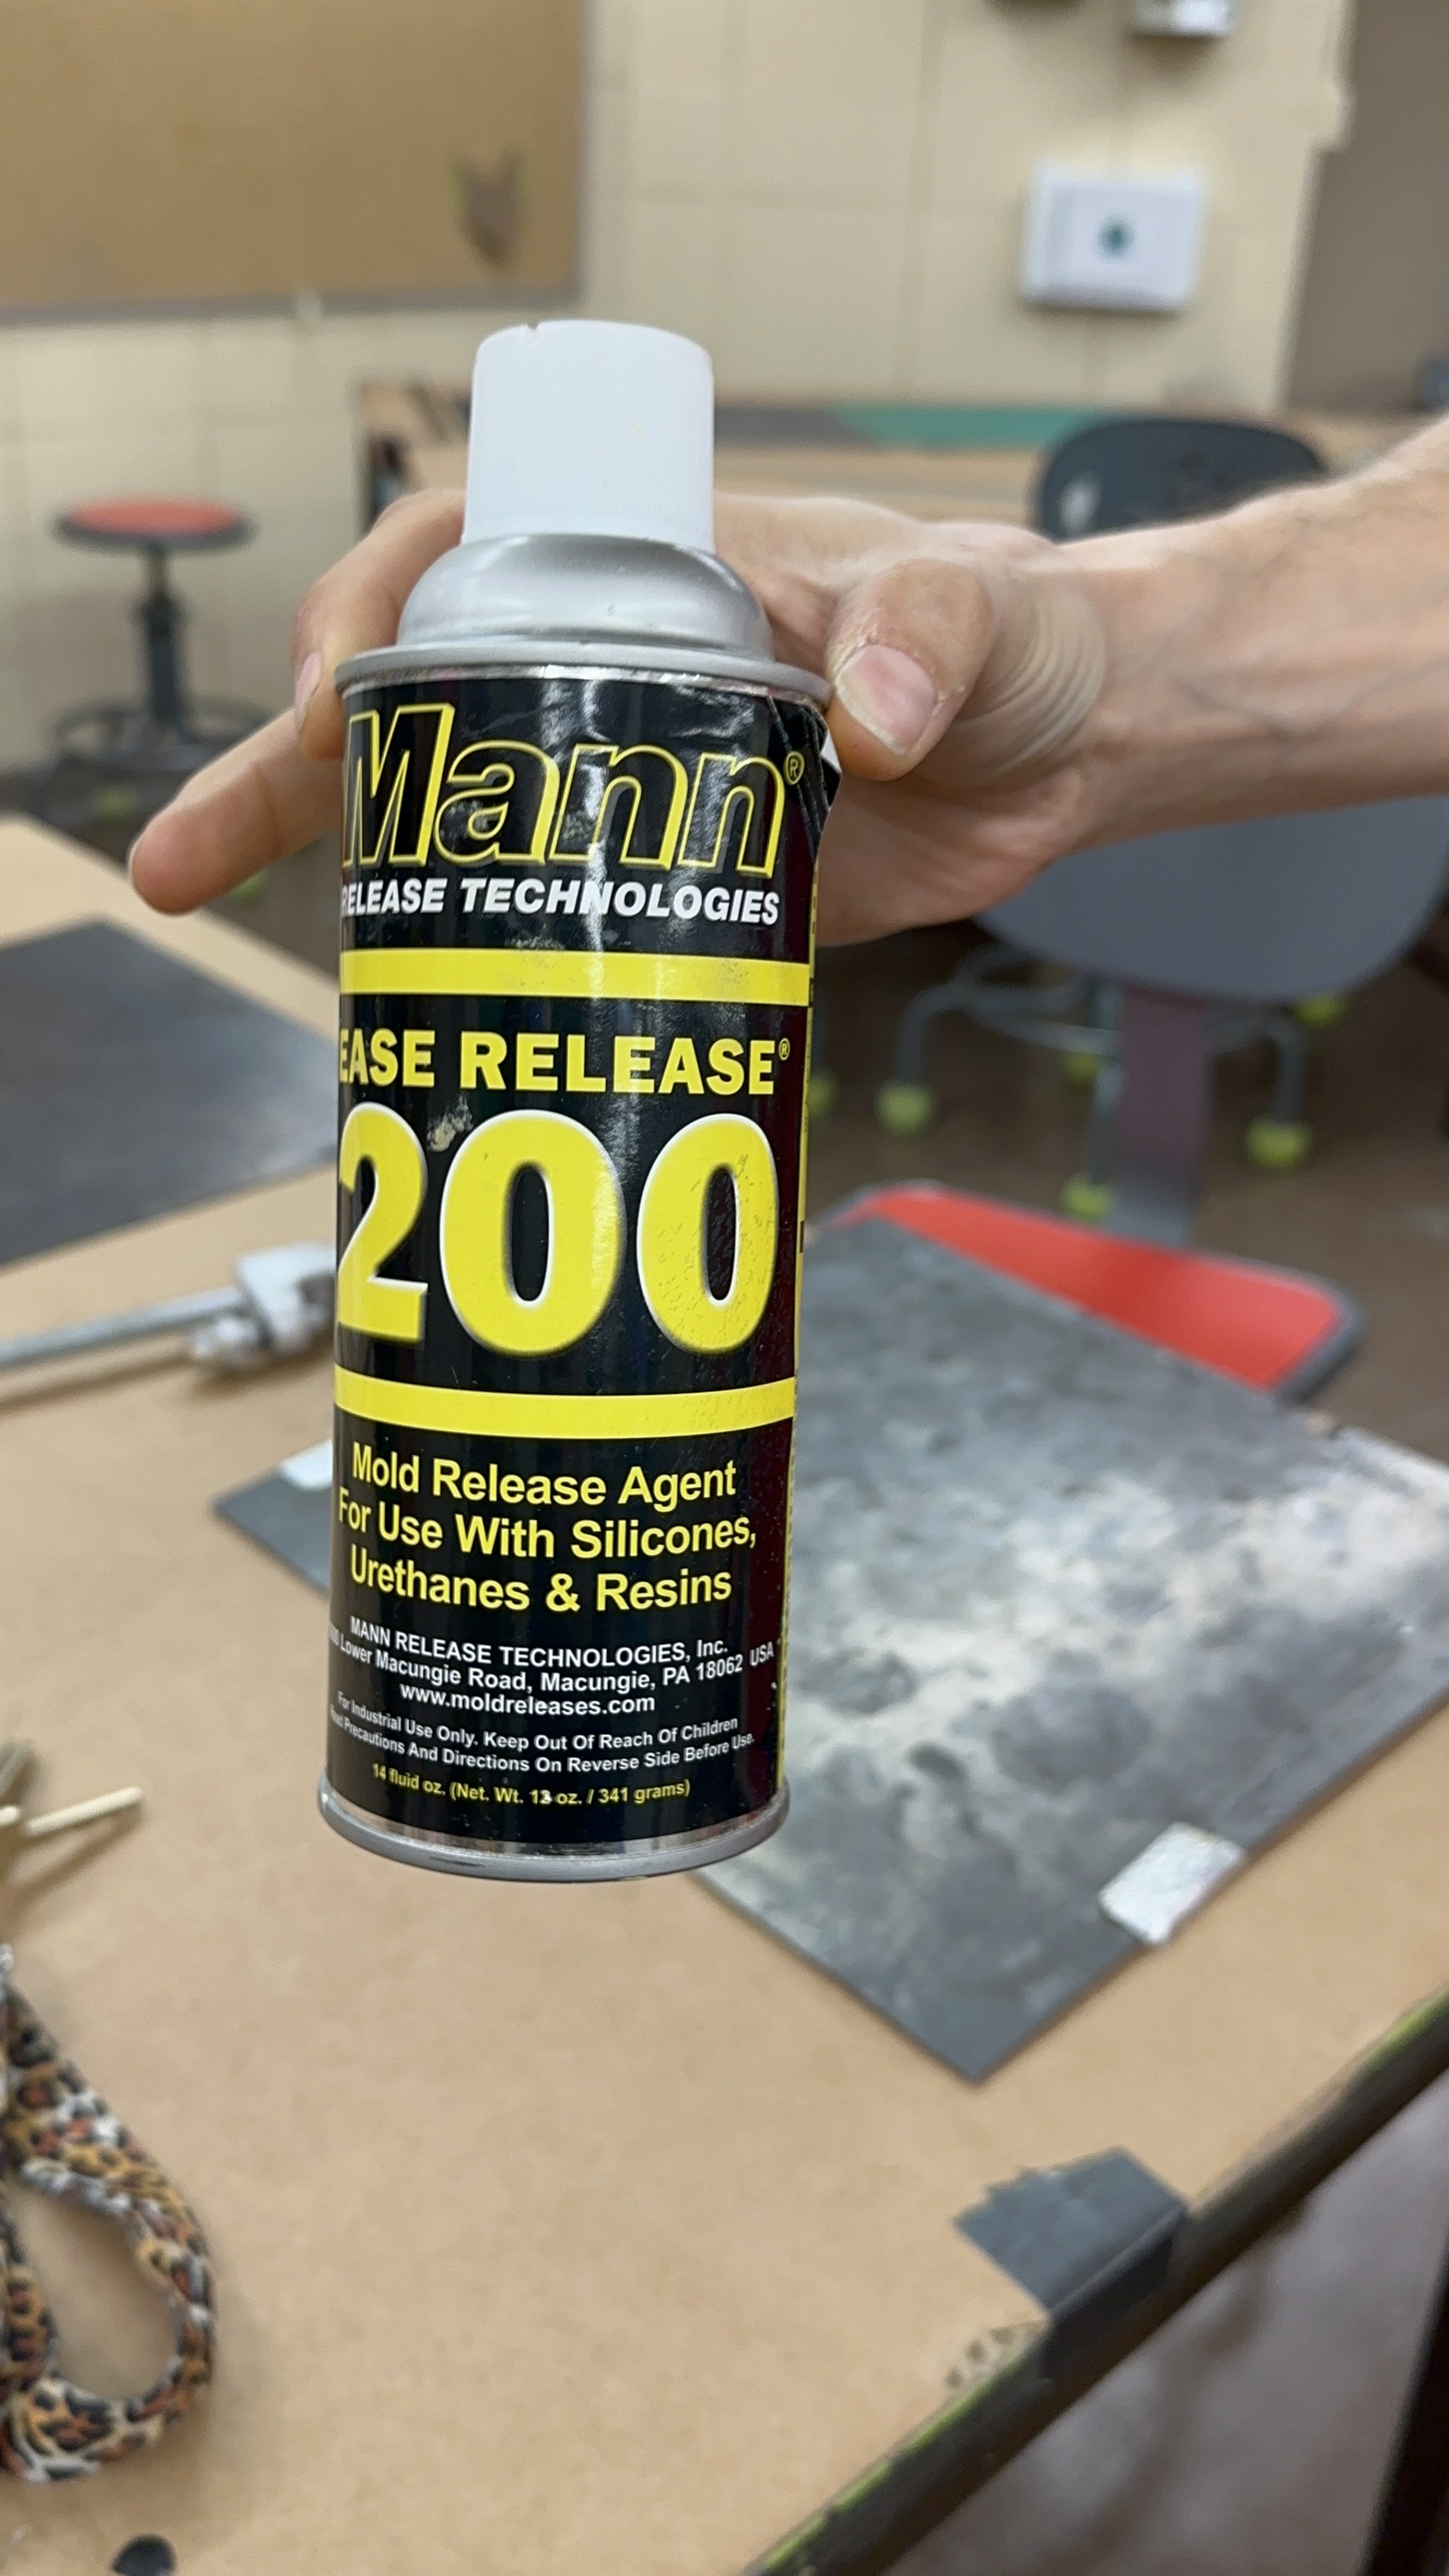
Spray pot with mold release agent to make it easier to pull it out from the molded plastic sheet.
-

2. Place a pot in the vacuum mold. First, create a small hole in the mold to make sure the plastic can probably vacuum seal around the pot.
-

3. Place the plastic sheet in the vacuum mold and set the temperature.
-
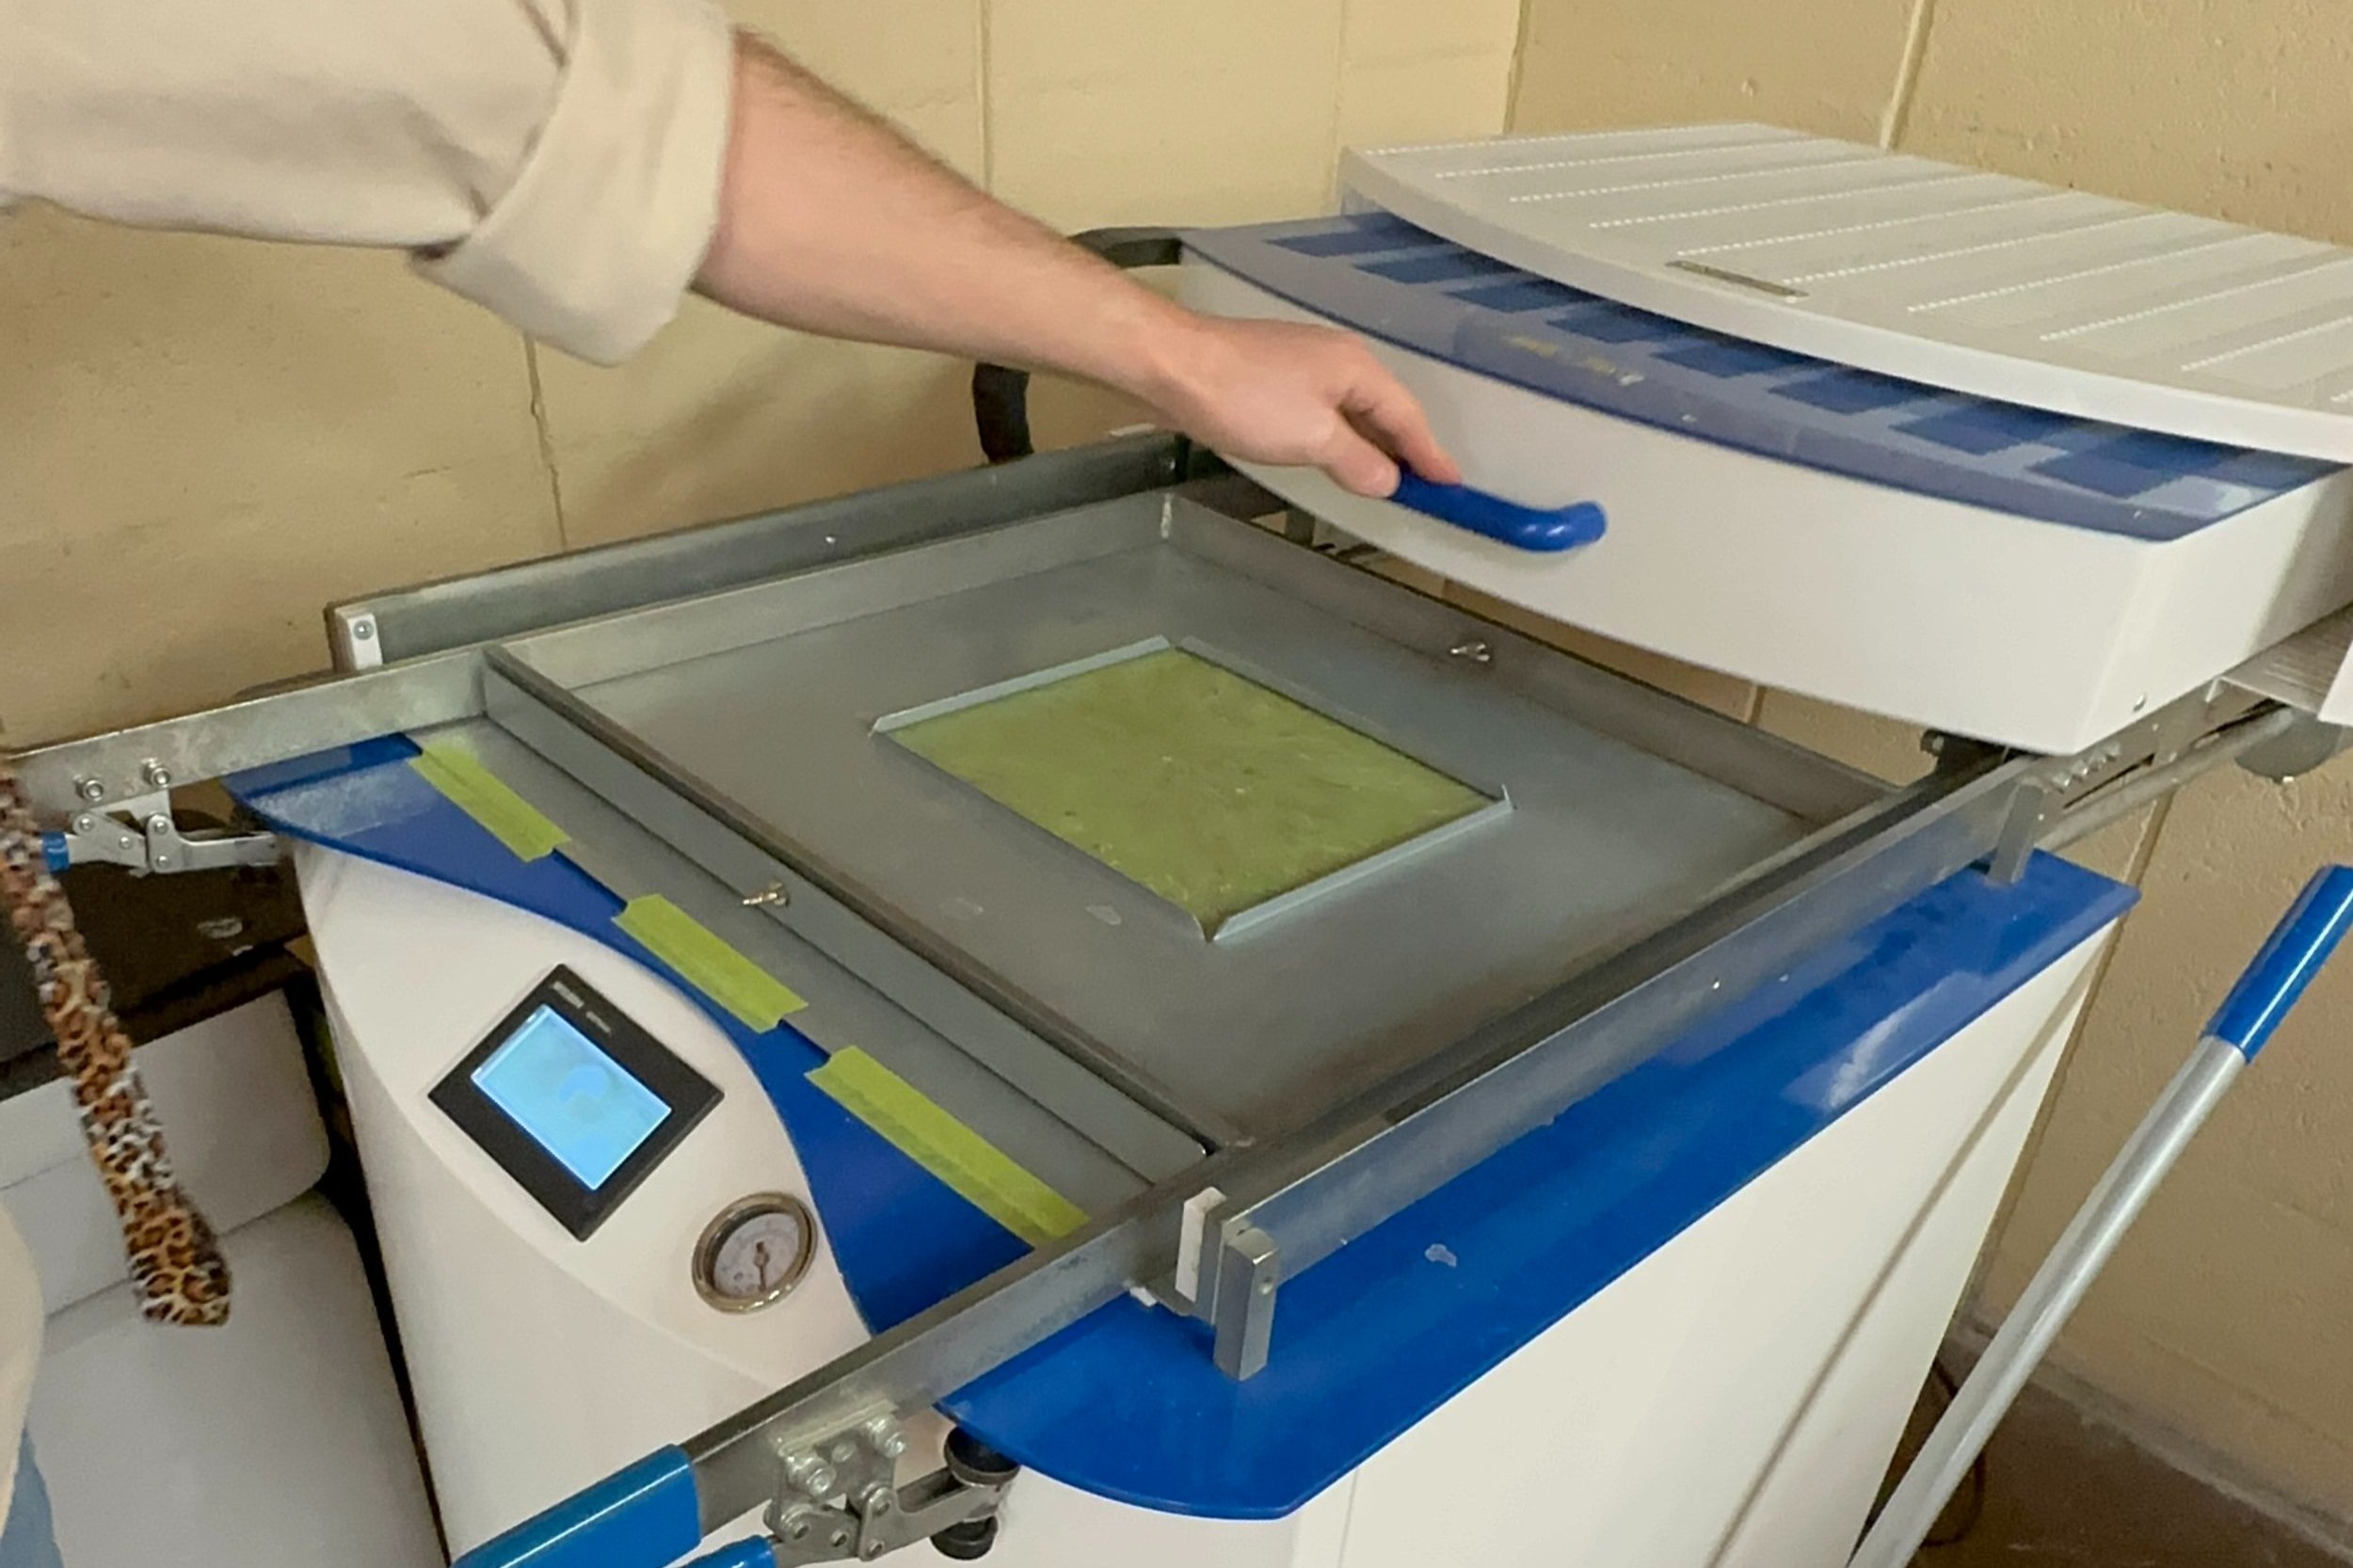
4. Close the vacuum mold drawer securely to start heating the plastic sheet.
-

5. Measure the temperature of the sheet consistently using a temperature infrared gun until it reaches 60degC.
-

6. Once the sheet reaches a temperature of 60degC, using the handle, bring the mold upwards. At the same time start the vacuum. The material will be very hot.
-

7. Place the coin at the bottom of the hot plastic molded pot, stating the type of plastic. Leave for 1 min.
-

8. Cool the molded plastic with pressurized air to not burn your hands when removing the molded plastic.
-
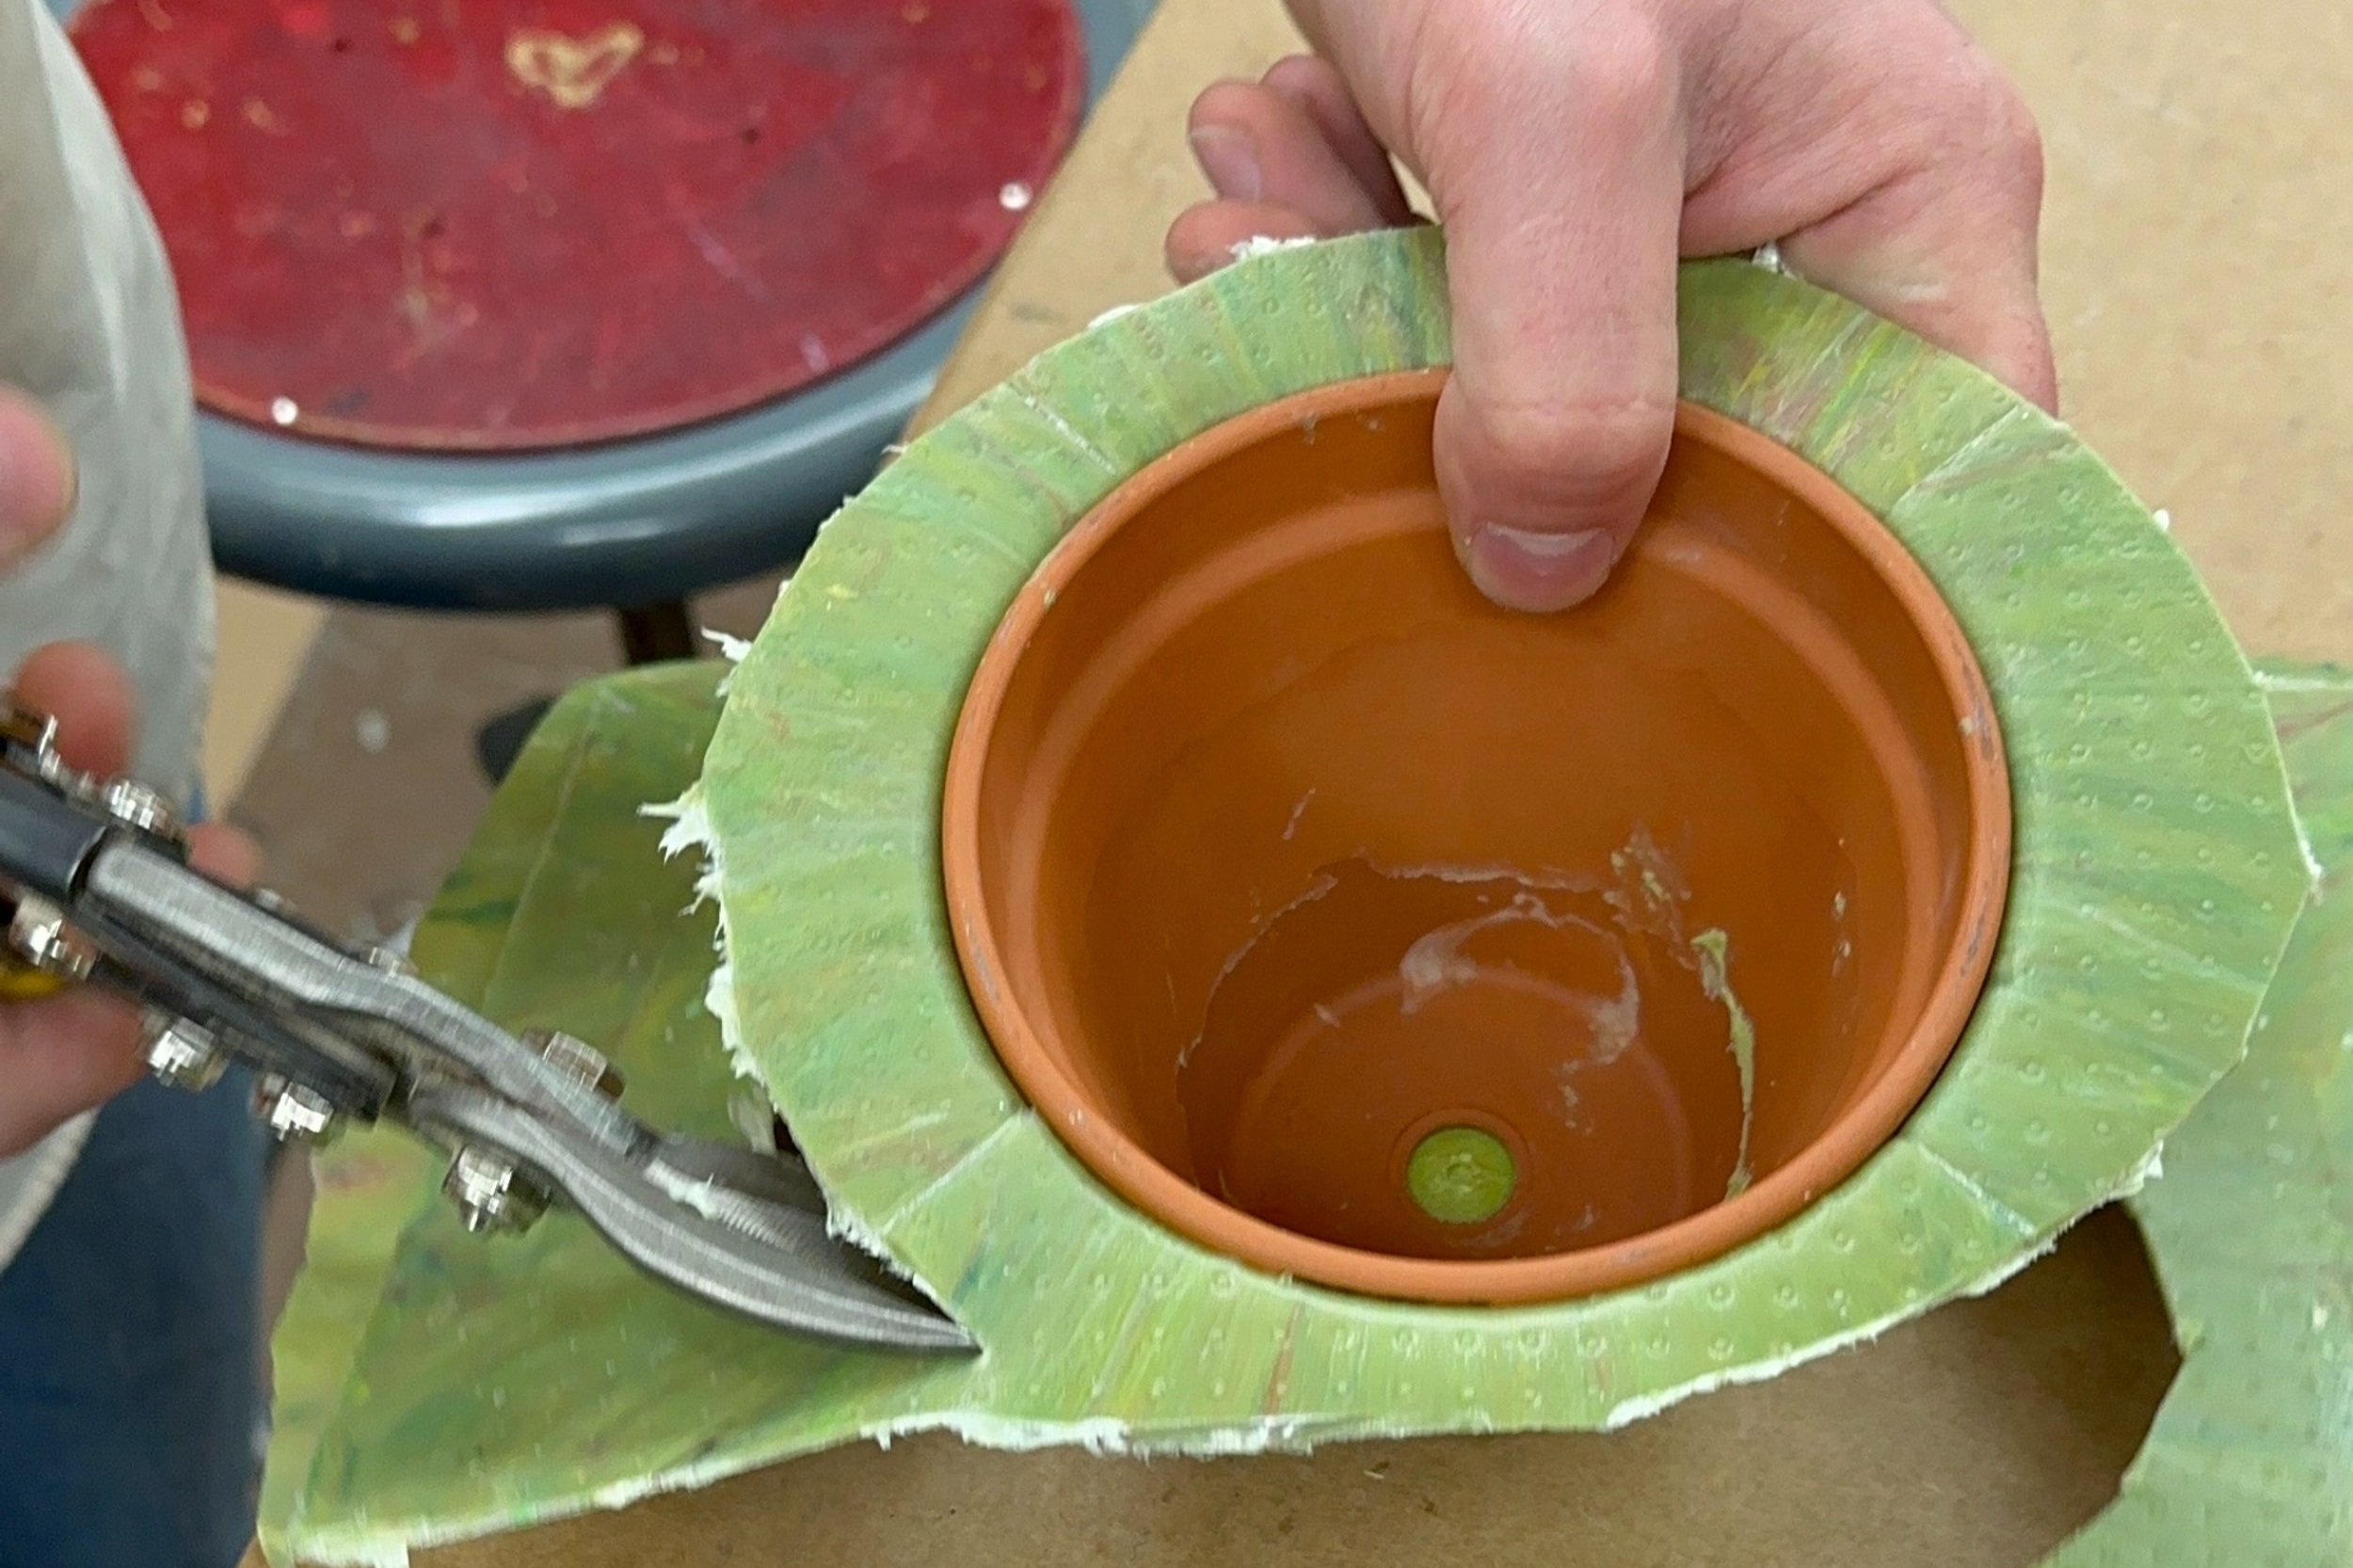
9. Using steel trimmers trim most of the excess plastic. Save these pieces to melt them for the next pots.
-

10. Use the pressurized air gun to cool the bottom of the pot.
-

11. Remove the molded plastic pot from the vacuum mold once cool and trim off the excess plastic from the edges with a shear and a mill. Keep the plastic trimmings to create other pots.
-
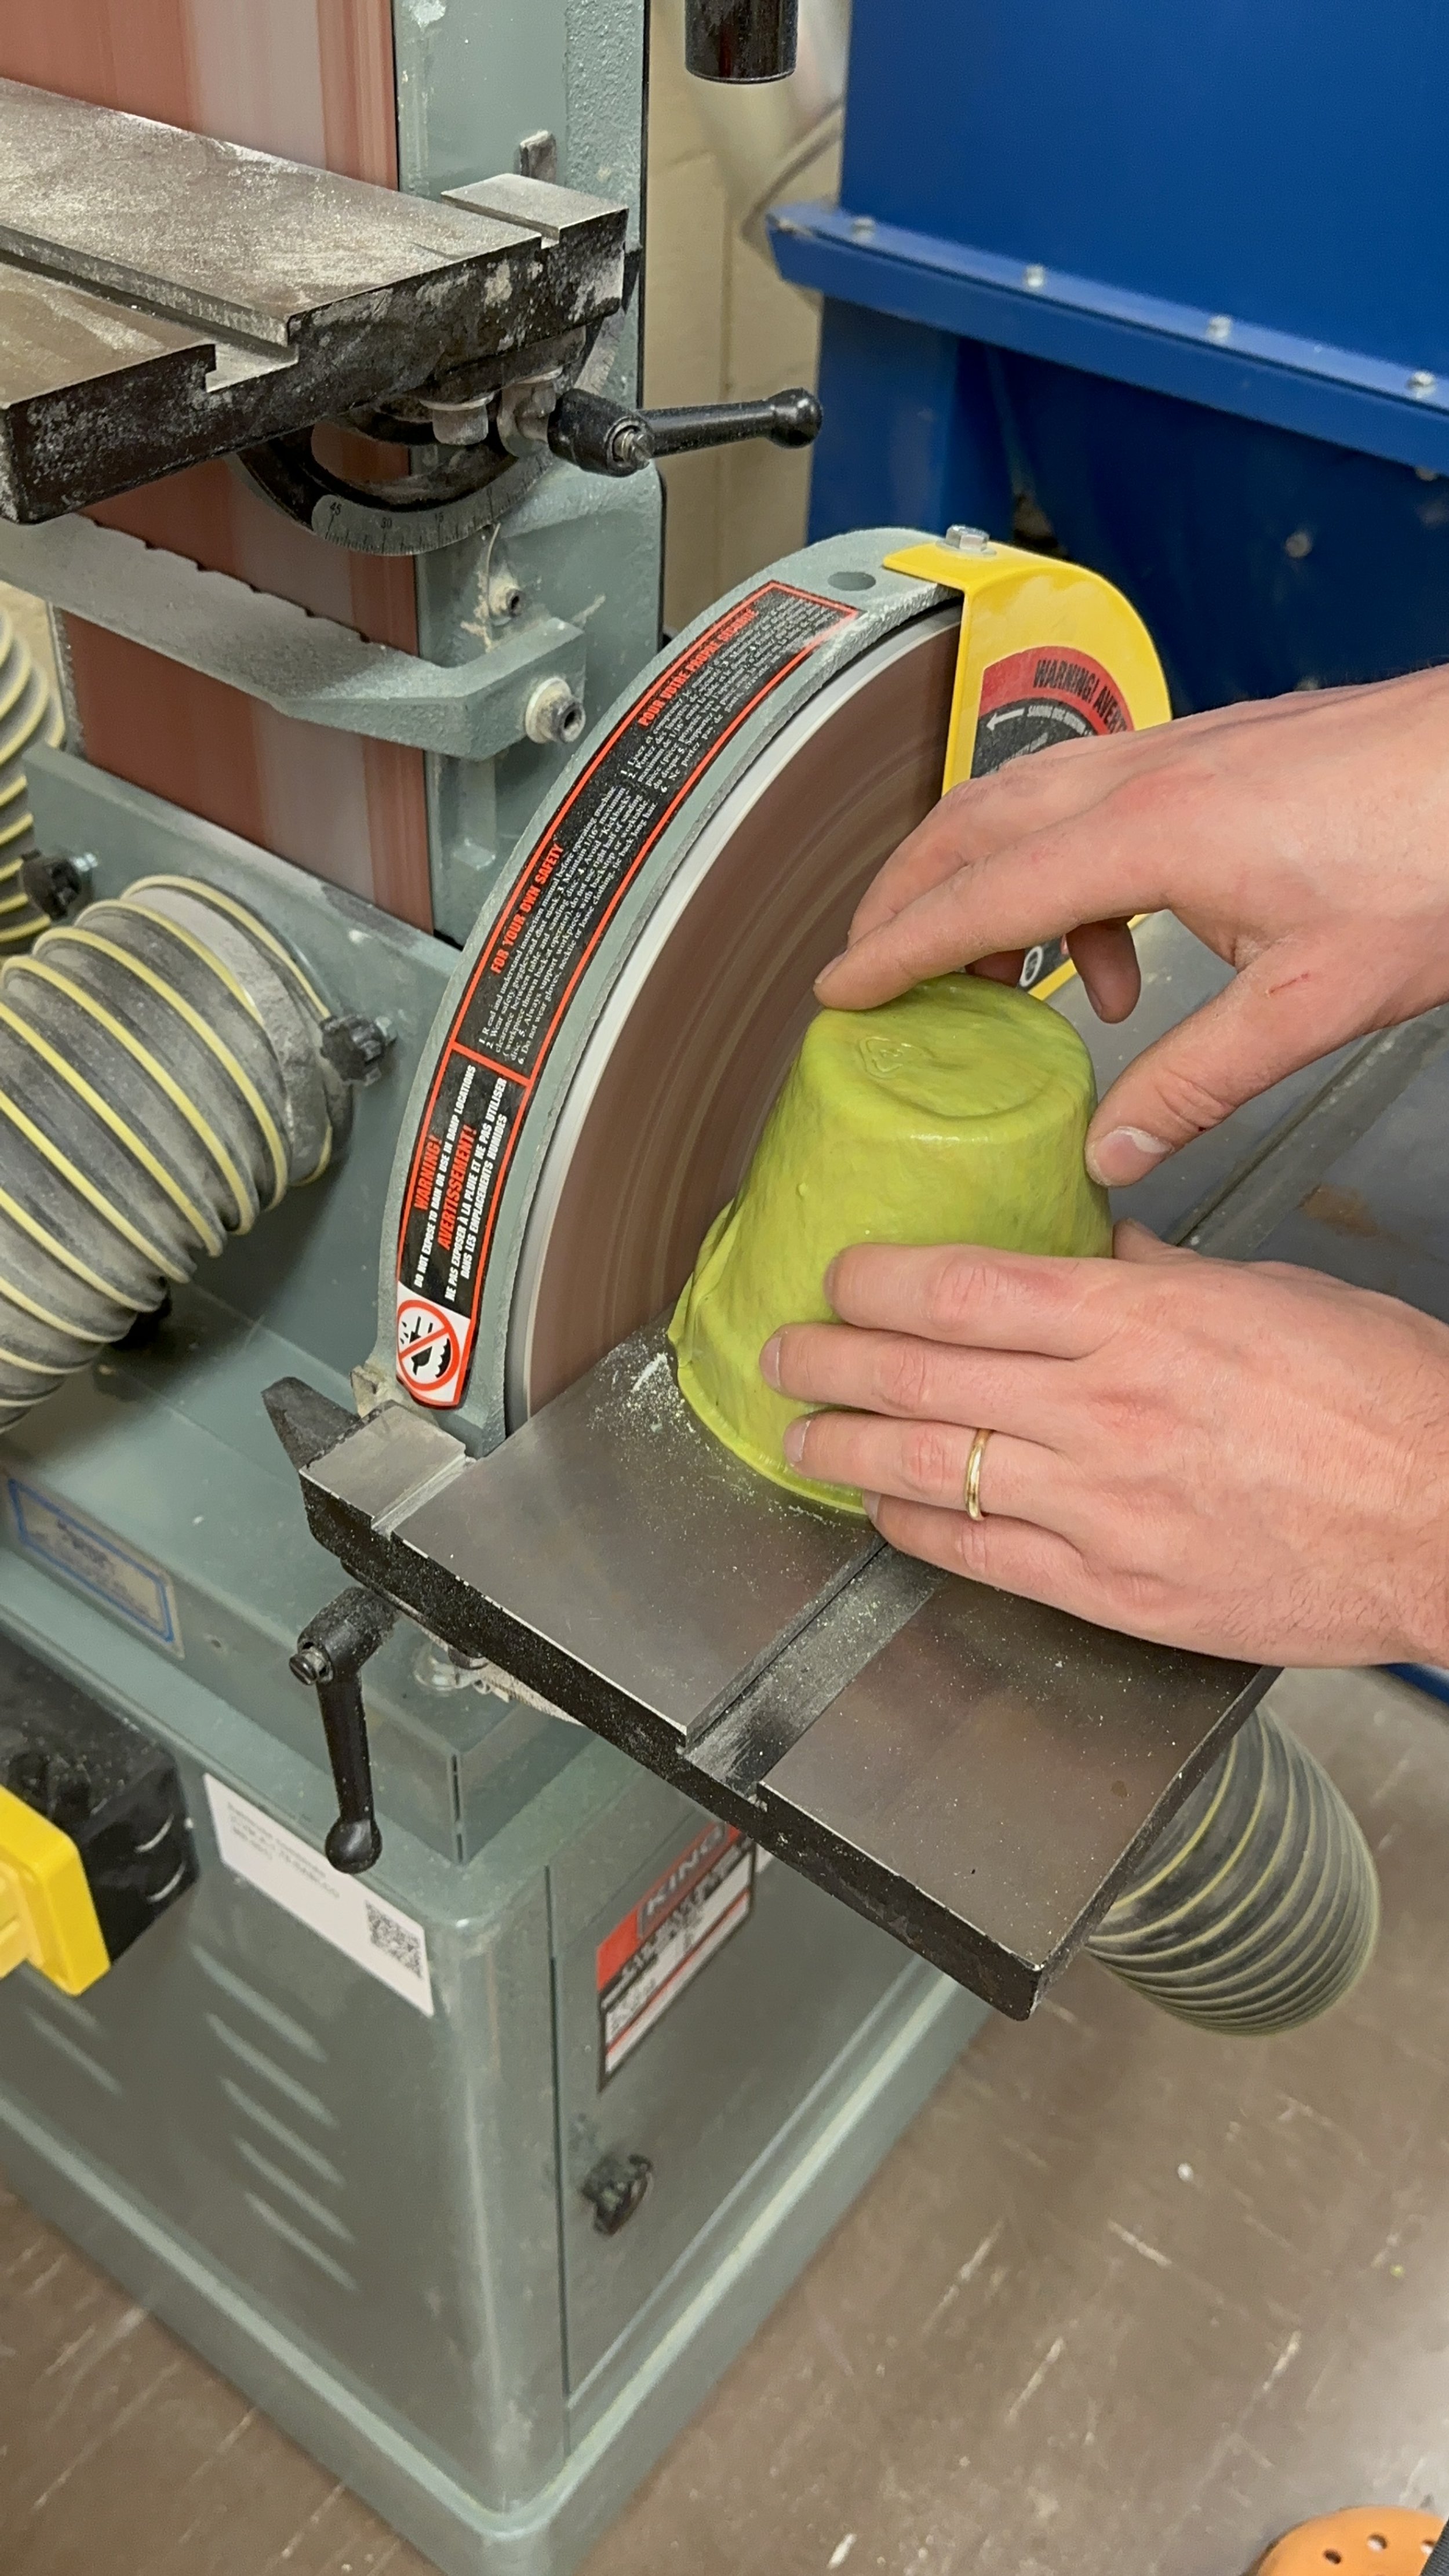
12. Sand the edges of the pot with a mechanical sander.
-
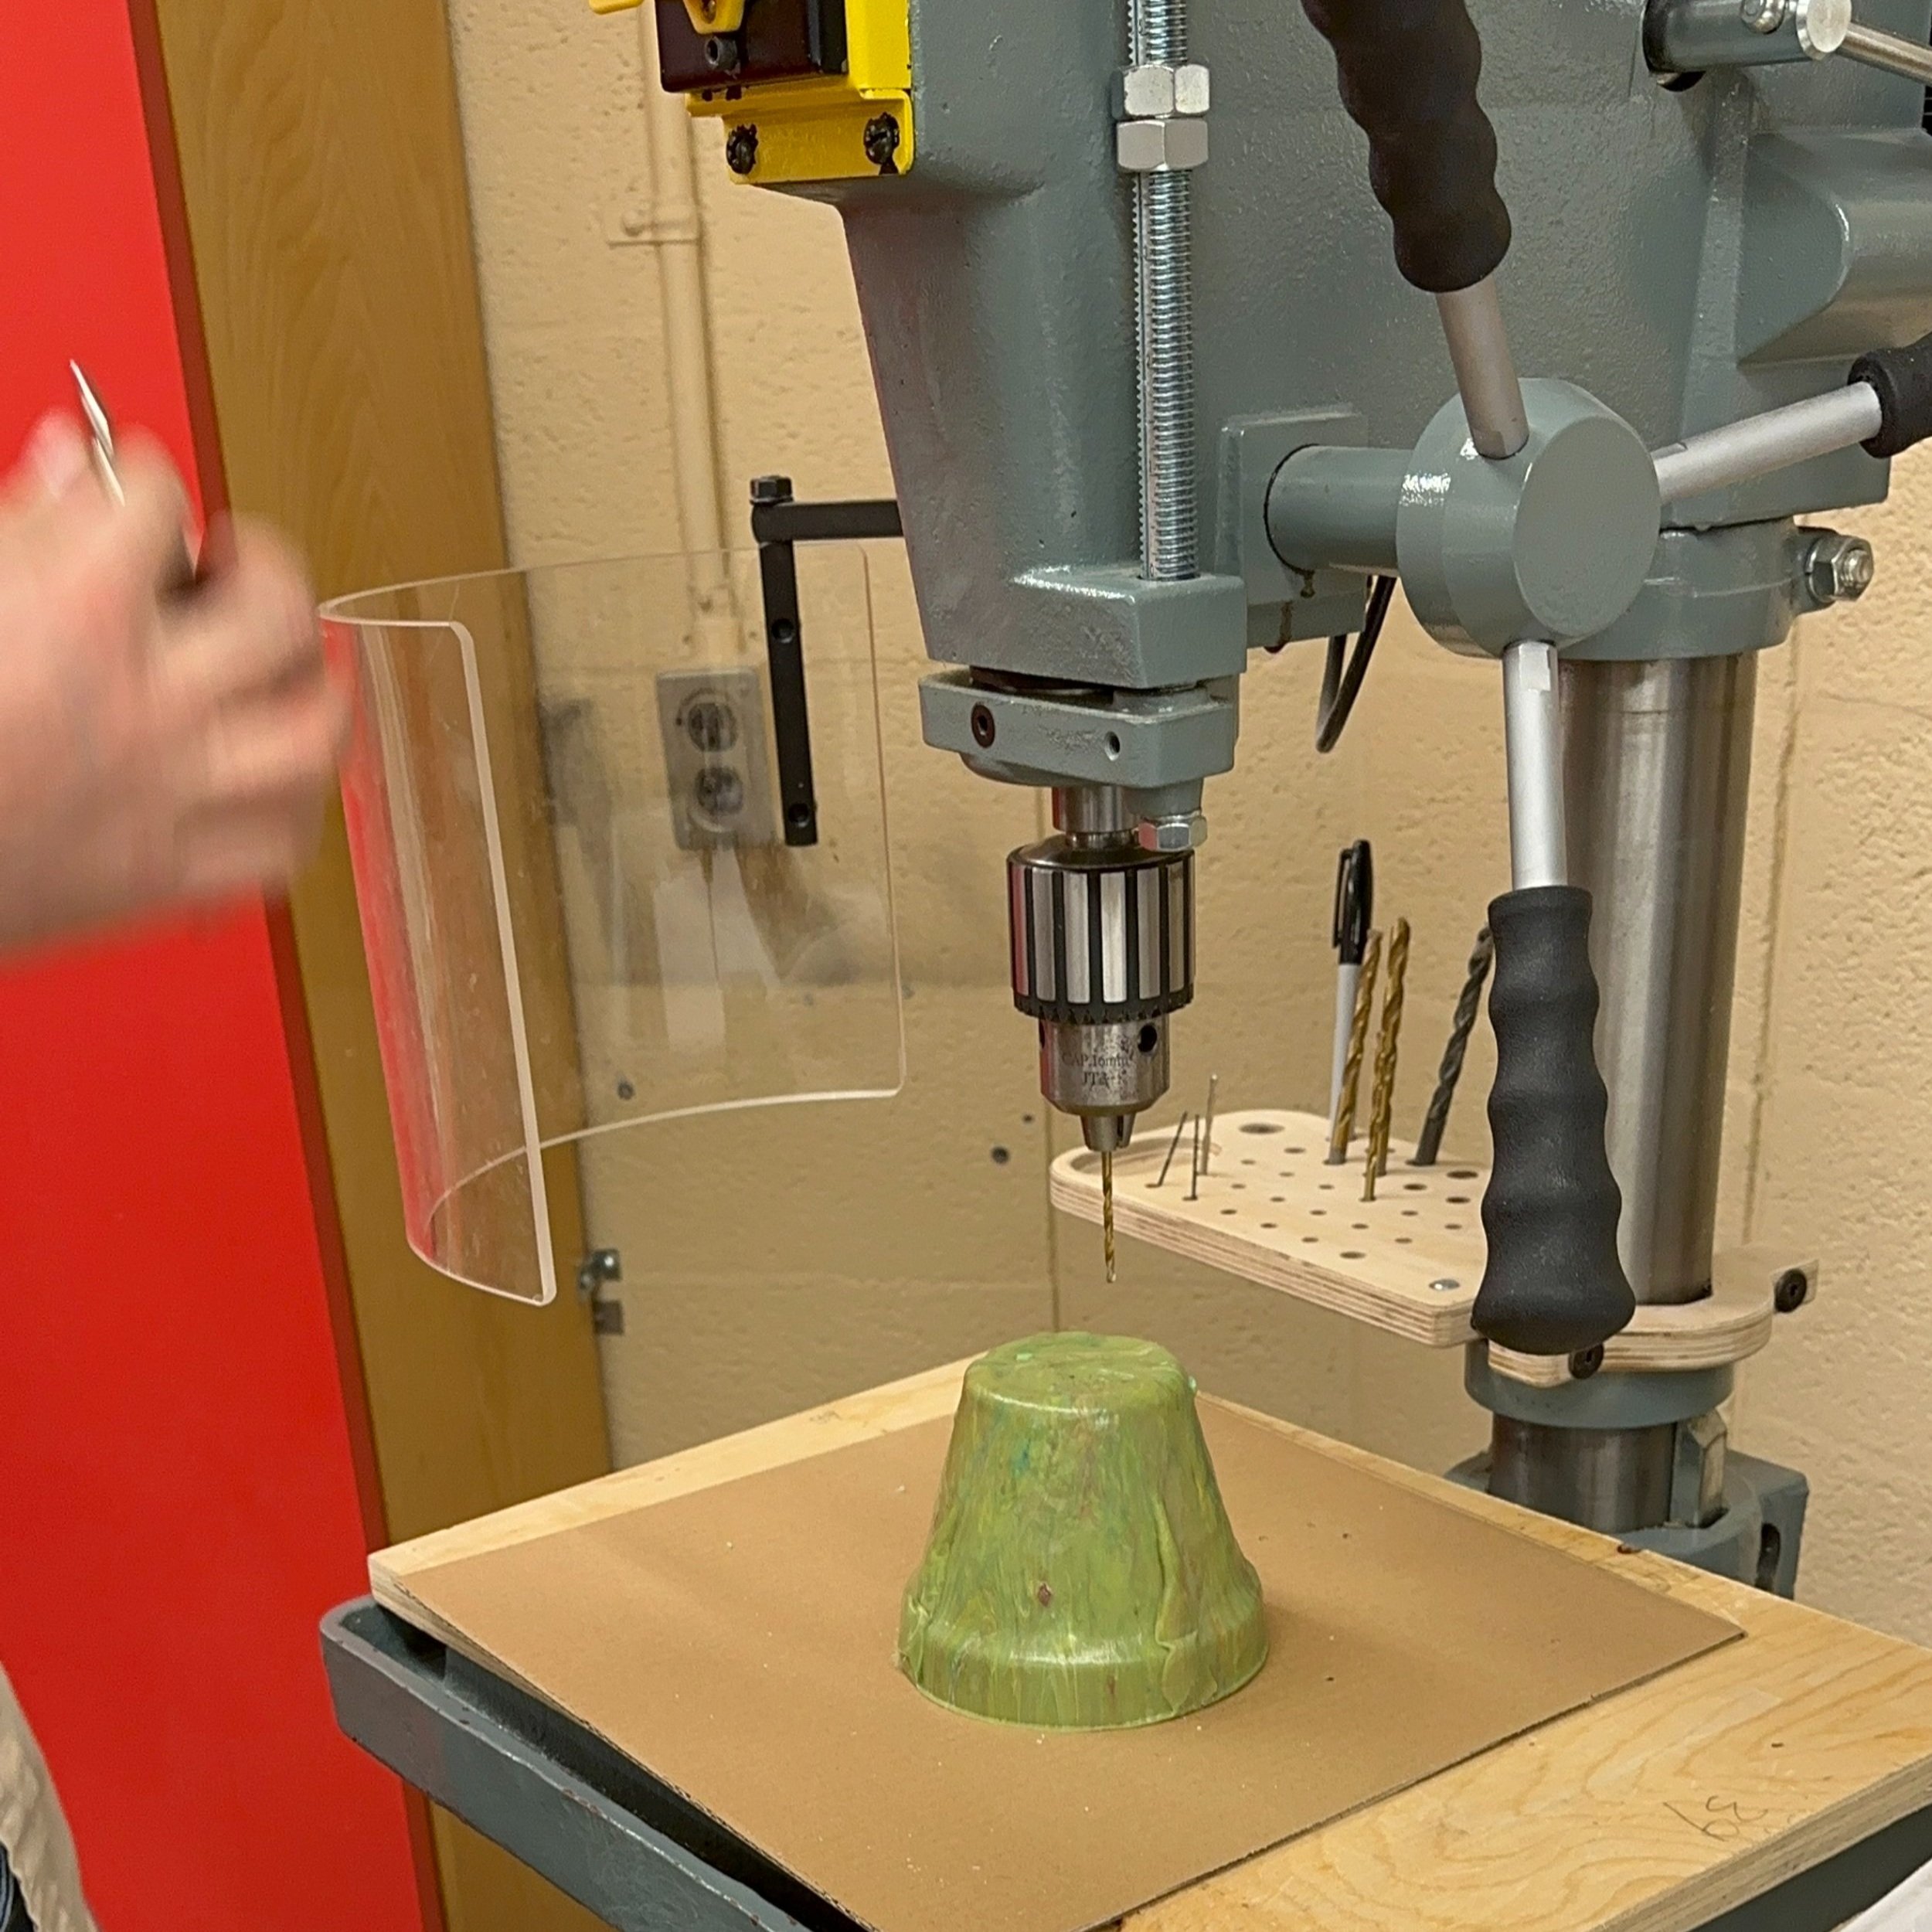
13. Create small holes with a drill at the bottom of the pot for water drainage.